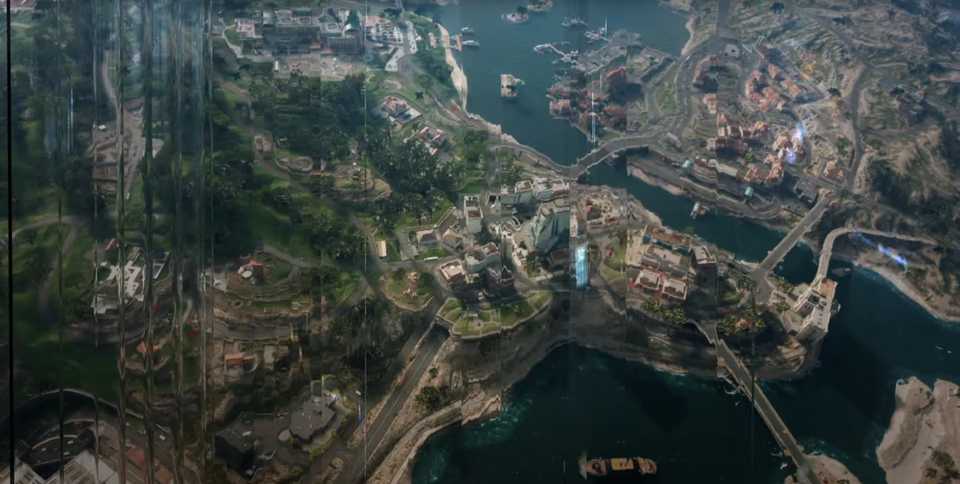
Astra Malorum has arrived, and this interstellar journey takes the crew to outer space to fight sci-fi robots and zombies in a continuing effort to save their drained souls. If you're looking for an easy-to-follow and step-by-step easter egg guide of Astra Malorum for Black Ops 7 Zombies, then you're in the right place.
Below, you'll find the ultimate guide for co-op and solo players alike to use so you can complete every step of the Astra Malorum EE, and claim the rewards that you seek to prove that you're the ultimate Zombies player who has what it takes to beat the steps, beat the boss, and take home yet another soul.

Ashes of the Damned Main Easter Egg Guide (BO7 Zombies)
Here's a full step-by-step walkthrough of the main easter egg for Ashes of the Damned in Black Ops 7 Zombies so you can easily complete the quest!
Step 1: Turn on the Power and Activate Pack-a-Punch
The first step is rather straightforward, and that's to turn on the Power and to activate Pack-a-Punch. To do so, you'll need to purchase the doors that will take you to the Observatory Dome, and then grab the Harmonic Component items that can be found within The Luminarium and the Machina Astralis. With these items, return to the Observatory Dome and interact with the Harmonic Oculus (the piano) to begin a lockdown, which, once ended, rewards Pack-a-Punch and the activation of Power.
Step 2: Obtain the LGM-1 Wonder Weapon
Here's a detailed guide on how to get the LGM-1. However, we'll provide a brief step-by-step below this link so you can continue with the main quest:

How to Get the LGM-1 Wonder Weapon in Black Ops 7 Zombies Astra Malorum (Easy Guide)
The LGM-1 is the Wonder Weapon featured in Black Ops 7 Zombies' Astra Malorum map. Here's a step-by-step guide to help you obtain it easily.
- Acquire the Damaged Drone, which is obtained by shooting a Drone that O.S.C.A.R. Deploys to defend himself.
- Acquire 3 Absolute Zero Fragments, which are obtained by shooting the Dark Aether Crystals around the map with a gun that has the Cryo Freeze Ammo Mod.
- Acquire the Car Battery, which is obtained by shooting the gear stick in Ol' Tessie at the Site.
- Acquire the Aberrant Wiring, which is obtained by shooting a flickering lamp post that is found randomly in the map.
- Kill O.S.C.A.R. With the Electro-Volt Projector Trap in The Luminarium by interacting with the trap and destroying his Drones to overcharge his battery.
- Kill O.S.C.A.R. With the Rocket Ignition Trap in the Museum Infinitum by interacting with the rocket and making O.S.C.A.R. Stand directly behind the rocket thruster. (If you fail this step, obtain more Absolute Zero Fragments and try again.)
- Kill O.S.C.A.R. With the Observatory Dome Trap by having him stand within the laser beam, which is activated by shooting 5 burst gas pipes that hiss steam, then by interacting with the piano opposite Pack-a-Punch to align the telescope with the Sun.
- The final trap will have O.S.C.A.R. Drop the LGM-1.
Step 3: Solve Thurston's Planets Puzzle
Once you have acquired the LGM-1 Wonder Weapon, it's time to once again locate O.S.C.A.R. This Elite enemy will be roaming the map, and your objective is to keep O.S.C.A.R. Unaware of your presence and follow close behind so that you can hear his dialogue. Stay behind O.S.C.A.R. Without aggravating him, and he will eventually play audio logs of Doctor Thurston. Listen closely and keep subtitles on, as you're going to need to remember the three planets that Thurston names:
- Mercury - 1
- Venus - 2
- Earth - 3
- Mars - 4
- Jupiter - 5
- Saturn - 6
- Uranus - 7
- Neptune - 8
Take the planets that Thurston lists and translate them into their numbered position from closest to furthest from the Sun. This will provide you with a three-digit code. Now, head to the Observatory Dome with Pack-a-Punch, and interact with a code machine on the northwest pillar. Doing so correctly will drop a platform opposite Pack-a-Punch when facing northwest, and you can jump up to interact with the corpse and grab the Cryo Chamber Key.
Step 4: Acquire Dr. Thurston's Brain
Inside the Machina Astralis room, you will find a cryo pod that contains the corpse of a man in a suit. Interact with the cryo pod thanks to the Cryo Chamber Key you acquired to open it and reveal Dr. Thurston's corpse. Now, you'll need to get a Rock Saw to grab his brain. To do this, head to the Museum Infinitum, and in the southwest corner, you can smash a display case to grab the Rock Saw. With the Rock Saw acquired, return to the frozen corpse at the Machina Astralis and interact with him to saw his skull open and take his brain.
At the east wall of The Luminarium, you will find a brain inside a jar. You can interact with the brain in a jar twice to begin a 60-second lockdown where you must defend the Perfusion Machine from zombies. Once the lockdown has ended, you can pick up the brain and walk with it back to the Machina Astralis, where you must place it in a rusted machine at the west wall, and then you can interact to connect the brain to the network.
Step 5: Solve the Books and Statues Puzzle
With the Dr. Thurston's Brain placed into the machine, return to the telescope by the piano opposite Pack-a-Punch in the Observatory Dome. Now, you'll need to locate Mars, and once aligned, note the DEC numbers on the bottom left of the screen. Take those numbers and input them into a device in the upper area of Machina Astralis, when facing west.
Back at the brain station at the Machina Astralis, book titles will begin to appear on a monitor to the left of the brain, and you will need to memorize all 5 titles that appear. Once you have your book titles, head into the Archive of Orbis. From inside the Archive of Orbis, you will need to interact with the bookshelves to locate the book titles the brain showed you.
Each wall has a set of bookshelves and a statue bust. The objective is to interact with the bookshelves, note how many of the correct books are on that wall, and then interact with the statue for the number of books on said bookshelf. For instance, if one wall has 2 books you need, then you'd interact with that statue bust twice. However, you only have around 15 seconds to interact with all statues, so make sure you know the number of times you need to interact with them.
After interacting with the statues by inputting the number of corresponding books that are on their wall, a trap door will reveal itself at the west wall when you climb the ladder. Climb the ladder and interact with the object to claim the Planet Neptune item.
Step 6: Align the Planets in the Machina Astralis
With the Planet Neptune, return to the Machina Astralis room, where you can place the item in the empty planetarium slot, found up the stairs, and when facing the sun from the southeast. Now, it's time to locate 3 pieces of paper that will showcase a planet and a direction (NW = northwest, and so on). Each piece of paper will have a unique planet and direction, but they remain in the same area:
- Paper #1 - On a desk in the Machina Astralis' main room, when facing south
- Paper #2 - On a desk with a bunch of notes and books, inside the center of the Archive of Orbis
- Paper #3 - On a coffee table in The Luminarum, when facing northwest
With your planets and directions now noted from the papers, return to the Machina Astralis and shoot each planet in the direction it should be facing. This is easily achieved by standing under the sun and looking at the directions pointed underneath it.
When your planets are correctly aligned, interact with the brain station to begin another lockdown. This lockdown lasts for around 2 minutes. The only objective is to let the portal charge and defend it from O.S.C.A.R., who will shoot drones into the portal, so make sure you destroy them before they can reach the portal. Once the timer expires, you'll be teleported to Mars.
Step 7: Activate the Pylons and Grab the Ascendant Eye on Mars
Now that you're on Mars, head to the center and pick up the brain. You can place this brain at an altar at the back of the map, where you will find the portal that takes you back to Astra Malorum. You can now interact with the brain at the beginning of a round to play a sound. Once this sound triggers, immediately rush to the southeast hole in the wall, where you will see four pylons in the distance. These pylons must be shot in the following order: back right > back left > front right > front left (from furthest to closest to you). If done correctly, the pylon will light blue if shot.
Now, quickly shoot the orb that sits above the temple to spawn the Ascendant Eye bird that will fly around. You will need to continue shooting the orb above the temple to freeze the Ascendant Eye, and wait for anti-gravity to activate so that you can jump and grab the bird when it's low enough. You can now place the Ascendant Eye inside a golden pillar in the south corner.
Step 8: Find the Symbol Sequence and Shoot the Mars Pillars in Order
With the Ascendant Eye placed on its statue in Mars, it's time to head back to Astra Malorum and enter the Observatory Core. You can now interact with a device to the right of the piano, which will display 4 distinct symbols in a unique order. One of these symbols will not be shown in the sequence. Once you've noted the order of the symbols, return to Mars with the LGM-1 at the ready.
On Mars, there will be 5 unique pillars, each with a symbol found on its surface. You must use the LGM-1 to shoot the top of the pillars. This will activate the pillars and prepare them for the next and final step.
The next step will start the boss fight, so make sure you're ready with your weapons, equipment, armor, Perks, and GobbleGums!
Step 9: Harmonize the Pillars and Summon the Boss
Once each of the pillars has been shot, you will need to interact with them in the order of symbols shown in the Observatory Dome. This needs to be done in quick succession, as the step will fail if you get the order of symbols wrong or take too long. Just make sure you know your symbols, including the one that was in the sequence, but wasn't visually shown. You'll know the sequence has been done correctly as each pillar glows blue. With each symbol now blue, interact with the brain to summon the boss.
Step 10: Defeat Caltheris, the Boss Fight of Astra Malorum
Caltheris is the boss fight in Astra Malorum, and it has four phases that are all equally deadly:
The first phase has Caltheris in the sky as the map itself, the giant floating skull. Your guns do nothing against Caltheris, and you will need to avoid its lasers and kill zombies to fill generators with souls. Once enough zombie souls are in the generator, interact with the brain at the altar to activate a firing sequence. This needs to be done a total of 3 times, with the third time requiring both pillars to be active.
The second phase has Caltheris as a rock monster that will chase you around the arena, so run and slide to keep distance, and focus on the glowing blue weak spot on the boss while avoiding her attacks. This is the same for the third phase, Caltheris Ascendant, where the boss gets a bit bigger and begins to throw rocks at you.
The fourth and final phase has Caltheris the Needle, which is a giant rock monster that will throw giant rocks that can stun you, and also produce a gas cloud that damages you. The damage phase is the same as the others, in which you need to break the boss's armor and focus on the glowing blue weak spots while maintaining distance to avoid death. Once the boss falls, the cutscene begins, and you will have completed the Astra Malorum easter egg!
You won't need to stick around after the main easter egg for Astra Malorum, as you will be able to hunt Cursed Relics as soon as the game registers that you have completed the EE.

-
 OpenCritic Reviews
- Top Critic Avg: 66 /100 Critics Rec: 34%
- Released
- November 14, 2025
- ESRB
- Mature 17+ / Blood and Gore, Intense Violence, Strong Language, Suggestive Themes, Use of Drugs
- Developer(s)
- Treyarch, Raven Software
- Publisher(s)
- Activision


