The Ashes of the Damned main quest in Black Ops 7 Zombies has been solved, and we have gone through and provided you with an easy step-by-step guide so that you can complete this main easter egg. Below is every single step in the correct order so that you can begin your journey as a Zombies master. Be warned, the Ashes of the Damned main easter egg is not easy, so you're going to want to give it your all. Without further ado, check out the steps below so you can complete the quest without getting lost or wasting valuable rounds.
Step 1: Activate Power in Blackwater Lake, Vandorn Farm, and Ashwood
To begin, you're first going to want to have the Power on at the three central locations on the map. In order to do that, you're first going to need to enter the Server Room at Janus Towers Plaza and melee the metal grate to free the T.E.D.D. Head, which you can take to the disabled Ol' Tessie to turn it online. After doing so, drive through the wooden gates (west or east is fine, as you'll have to backtrack and do the other regardless). To activate the Power in each location, simply shoot the fungus on the Power Pumps within the time limit, then repeat the step in Ashwood. Doing so will reward you with the Ashwood Blacksmith Garage, which you can use to upgrade Ol' Tessie with Pack-a-Punch.
Step 2: Acquire the Abomination Heads Upgrade to Ol' Tessie
Now that you have Pack-a-Punch and Ashwood's power switched on, you can take Ol' Tessie southwest, where you will enter Exit 115. Within Exit 115, purchase the door to Reba's Dinner. From Round 5 onwards, a zombie will spawn inside Reba's Dinner called the Cook, who can be killed to drop the Freezer Key. With the Freezer Key acquired, head to the southwest wall of Reba's Diner and interact with it to open the freezer and grab the Abomination Carcass. With the Abomination Carcass, head back to Ashwood's garage and upgrade Ol' Tessie by interacting with the workbench.
Step 3: Acquire the Necrofluid Gauntlet Wonder Weapon
We have an in-depth guide on how to get the Necrofluid Gauntlet here, but we will also explain the steps below.
The Necrofluid Gauntlet is the essential Wonder Weapon needed to progress the main quest, and here's a quick step-by-step to help you get it without wasting unnecessary rounds:
- Enter Ashwood and head left of Vulture Aid to open the Ashwood Sheriff's Office, where you will find Klaus in a cell
- On Round 8+, head to Janus Towers Plaza and run to the west as if you were going towards Blackwater Lake, and an Uber Klaus enemy will spawn. Kill Uber Klaus, and he will drop the Stabilizer Chip
- Take the Stabilizer Chip back to Klaus' cell in Ashwood by interacting with the terminal on the door
- When Klaus deactivates, throw 2 to 4 Stun Grenades inside his cell to wake him up
- Head to the Zarya Cosmodrome with Klaus (who will now follow you, but can be recalled at Klaus Stations on the map) and enter the Support Systems area by going down the stairs
- Ping or press L1 at the console next to the locked cabinet to see Klaus activate a green button
- Interact with the green button and stand in the red scanning circle while looking up at the camera until the scan is complete, but kill any zombies that try to kill you during the process (Monkey Bombs are advised)
- Pick up the Aether Barrel from the now unlocked cabinet and place it in the Power Pump at Ashwood, then the Power Pump at Blackwater Lake, then the Power Pump at Vandorn Farm
- Take the Aether Barrel from Vandorn Farm's Power Pump and, with it on your back, interact with the box in the Barn's Cellar
- Use Jump Pads at Vandorn Farm and Janus Towers Plaza to see three distinct symbols on the roofs of the Barn, Silo, and Farmhouse
- Once you memorize the symbols, head back to the box in Vandorn Farm's Cellar and interact with each face of the box until your 3 symbols appear, then interact with the eyes on the back of the box to get the Necrofluid Gauntlet
- Finally, shoot the green orbs that appear within the Cellar with the Necrofluid Gauntlet, and reload to recall the spikes you shot to explode the green orbs
Step 4: Acquire All 6 Serum Parts
With the Abomination Carcass on the hood of Ol' Tessie, and the Necrofluid Gauntlet as your weapon, it's now time to go around the map and collect some unique parts for the easter egg. We're going to collect all 6 Serum parts in Ashes of the Damned, and here's how to collect each one:
Serum Part #1 – Widow's Lantern
Head inside Blackwater Lake, where you can access the Cabin. Inside the Cabin's kitchen, you can look at the bottom shelves on the south side and interact with the cupboards by the sink to get the Jar of Spores. With the Jar of Spores, head to Vandorn Farm, where just before the fence and by a destroyed car, you'll find the carcass of a horse covered in fungus. Interact with the dead horse and progress 3 rounds. After 3 rounds, the fungus will grow into Widow's Lantern.
Serum Part #2 – Human Bones
Remaining in Vandorn Farm, you can enter the Barn where you will see a hanging body in the center, noted for its two legs and the rope tied to its wrists. You will need to throw a Combat Axe at the corpse's right foot to see it drop (you can get a free Combat Axe from Reba's Diner in Exit 115). Now, throw a Molotov at the dropped foot (you can get a free Molotov outside the Ashwood garage). After the burning stage, the foot will become Human Bones.
Serum Part #3 – Ravager Eyes
Remain in the Vandorn Farm area for this step, as you will want to wait for a Ravager to spawn. This enemy, noted for running on all four limbs, must be killed with the Saw Blade Trap that can be found outside the Barn. Once the Ravager has been killed by the trap, it will drop the Ravager Eyes item.
Serum Part #4 – Hoard Husk Chunks
With Ol' Tessie, enter any of the roads that take you from one location to the other. In these foggy areas with infinite spawning zombies, you will find a glowing purple plant just out of bounds, not to be confused with the green or orange plants. Use the Beam Attack from the Abomination Carcass with RB/R1 to shoot the purple plant, which will cause it to explode and drop the Hoard Husk Chunks item.
Serum Part #5 – Powder of the Forgotten
The reason we completed the Necrofluid Gauntlet quest was so that we could get this specific Serum part. Firstly, you must go to Zarya Cosmodrome to purchase the Wisp Tea perk. Now, head to Ashwood, where you will find the Tailor Shop in the east, just to the right of Vulture Aid. Once you've activated Wisp Tea (done through dealing damage to enemies), you will need to head inside the Tailor Shop and stand by the mirror, as Wisp Tea will damage the mirror, and you can then smash it by shooting it with the Necrofluid Gauntlet. This will drop the Powder of the Forgotten.
Serum Part #6 – Mysterious Limb
You can only get the final Serum part on Round 16+, as that's when Zursa the zombie bear will spawn. In order to get the Mysterious Limb, you must kill Zursa the Elite Enemy with Ol' Tessie's Beam Attack. Feel free to weaken Zursa with your guns, just make sure the final hit is from Ol' Tessie's Beam Attack to drop the Serum part.
Step 5: Solve the Serum Puzzle (With Our Solutions)
With all 6 Serum parts acquired, it's time to head to Zarya Cosmodrome, where in the southwest area you will find Yuri's Lab. Once inside the lab, interact with the Powder of the Forgotten, found in the 5th bowl, and the chemical equipment will go up in smoke. Once the smoke dies down, the chalkboard will reveal three codes with unique symbols. The symbols are from the Pigpen cipher, which you can translate directly from this website. You only need to know the first symbol in order to solve each line of code. With the code translated, you will need to interact with the ingredients from top to bottom, and here's what each of them means:
- > – Human Bones (1st bowl)
- L – Hoard Husk Chunks (2nd bowl)
- C – Widow's Lantern (3rd bowl)
- C. – Ravager Eyes (4th bowl)
- Ignore 5th bowl
- L. – Mysterious Limb (6th bowl)
After interacting with the ingredients on your chalkboard, you will know you've done it correctly as red smoke will ooze from the chemical equipment. Now, approach the chemical station and interact with the vile to add your blood, which takes away some of your health. At this point, you will enter a lockdown sequence where you have to kill all the zombies that spawn inside the room, and your health does not regenerate. We recommend using the Necrofluid Gauntlet, as dealing damage and reloading will heal you. After this step, the world state will change, and Ashwood now has a floating clock by the Ashwood Bridge and a locked chest in Rabbit Alley.
Step 6: Find 3 Keys to Unlock the Locked Box in Ashwood's Rabbit Alley
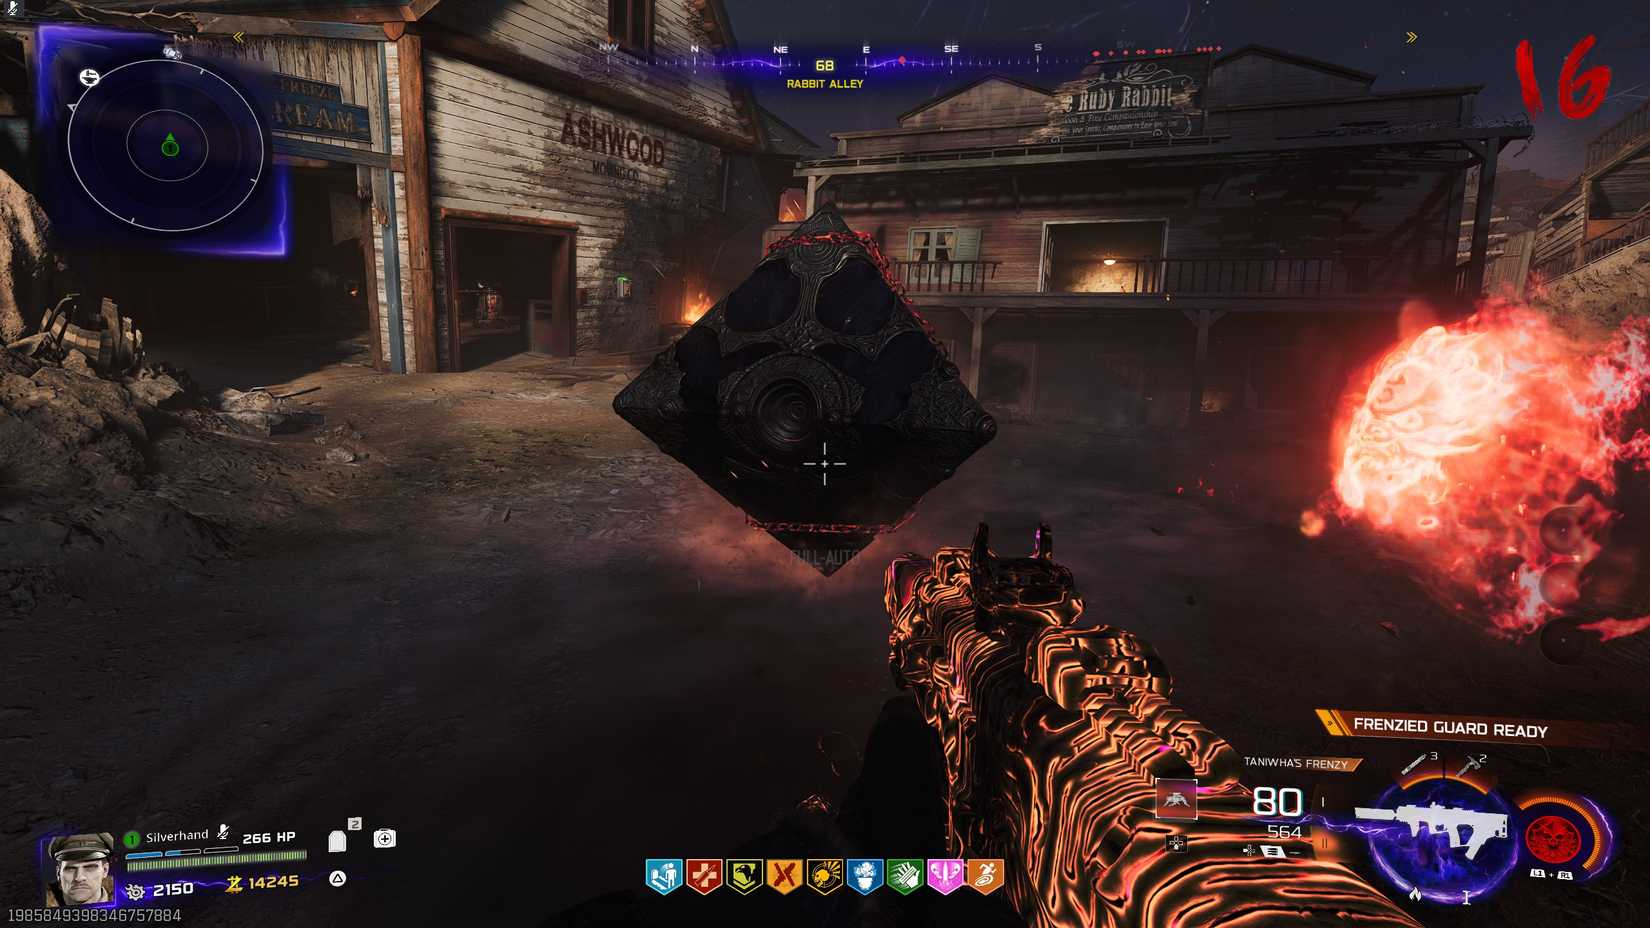
With the Serum steps solved, you can now return to Ashwood. Ashwood is the central location of this next step, and you will definitely need Ol' Tessie, perhaps some Kazimir grenades, your Necrofluid Gauntlet, and some armor, as it's going to get rough. This objective requires you to find three distinct keys in the map, and each key has 3 potential spawns that we will list below. Once you've found the key (which is hard to see), you must pick it up by shooting it with the Necrofluid Gauntlet and reloading to pull it to the ground, and then take it to the locked chest in Rabbit Alley. Here are all the keys and where to get them:
Terrapin Key (Green Key Location)
The Terrapin Key is found in the Grounded Ship, which is the road between Ashwood and Vandorn Farm. Once you pick up the Terrapin Key, you will have your sprint disabled, so it's imperative that you get back into Ol' Tessie as soon as possible. There are three locations, and you will know you've found the Terrapin Key thanks to the green glint in these distinct spots:
- Green Key Location #1 – Underneath the Grounded Ship when facing east and looking at the two barrels just out of bounds
- Green Key Location #2 – On the Grounded Ship, within the southeast window by the crates between them
- Green Key Location #3 – On the Grounded Ship, within the northwest blue shipping container that's slightly open
Bruin Key (Yellow Key Location)
The Bruin Key is found in the Crashed Rocket, which is the road between Ashwood and Zarya Cosmodrome. Once you pick up the Bruin Key, you will be forced to equip your knife and nothing else, so be prepared to sprint or drive back to Ashwood. There are three locations for the Bruin Key, and here are where you will find the yellow glints:
- Yellow Key Location #1 – Found on the east cliff just after leaving Ashwood
- Yellow Key Location #2 – Obtained on the beams of the crashed pylon when facing southeast
- Yellow Key Location #3 – Located on the southwest array tower on the way to Zarya Cosmodrome
Nightbird Key (Red Key Location)
The Nightbird Key can be found in the Orda Graveyard, which is located between Ashwood and Exit 115. When holding the Nightbird Key, you will trade a bunch of health, and it will not regenerate until you deposit the key at the Ashwood box, so make sure you're staying protected by getting back in Ol' Tessie. Here are the three locations you can find the red glint for the Nightbird Key:
- Red Key Location #1 – At the back of the T-Rex skull found in the south area, just after leaving Ashwood
- Red Key Location #2 – Within the mouth of the T.Rex skull found in the west area of the road. This one is harder to see, so spam shoot it with Necrofluid and reload to see if it's here if you can't find it anywhere else
- Red Key Location #3 – Behind the Project Janus trucks at the northeast, just after leaving Exit 115
With all keys now placed into the box at Rabbit Alley, you will start a mid-game cutscene. After the cutscene, you will spawn back in with the DG-2 Turret Barrel waiting for you to pick up. Return to the Ol' Tessie garage in Ashwood and upgrade it with the DG-2 Turret Barrel.
Step 7: Free the Three Souls in Exit 115
Ol' Tessie now has the DG-2 Turret Barrel attached to it, which you can use to aim at the floating clock tower in Ashwood. After shooting the clock tower, it will chime and glow, and you can then shoot it with the Necrofluid Gauntlet, and reload to become astral and purple. Within this mode, take a drive to Exit 115, where you will see a bunch of different lightning strikes. If there are no lightning strikes, then skip to Step 8 or Step 9, and return next Round, as the lightning strikes will appear every 2 Rounds.
You can force the lightning to spawn every round by heading to Exit 115 and shooting a sparking lamp post with the DG-2 Turret on Ol' Tessie, to which another lamp post will begin to spark, and then a final third. Shooting all three will spawn the lightning.
If there is lightning around the rooftops of Exit 115, then you will need to activate three souls around the map and guide them to their distinct lightning strikes. To spawn the souls, you will need to shoot the southwest clock on the Service Station Rooftop with the Necrofluid Gauntlet in the purple mode. As soon as you shoot the clock, you will have 60 seconds to find and release the three souls. This is hard to do, so it might take a few rounds. We advise doing one soul at a time and returning here when there's more lightning, as you can only activate the Exit 115 clock once per round (during lightning phases), but the souls you've freed will remain freed, meaning you don't have to do them again if you've completed them individually:
Soul #1 – The Trucker
With the Lightning Strikes active from shooting the clock, ram Ol' Tessie into the back of the truck at the diner. This will see a soul enter the dead trucker zombie, and now you will need to lead the zombie up to the southwest rooftop with the pink lightning.
Soul #2 – The Waitress
For this soul, you will need Melee Macchiato. Enter Reba's Diner and use your melee button to hit the cash register. This will see the Waitress resurrect, and you can now guide this zombie to the Diner Rooftop, where you can make her enter the purple lightning.
Soul #3 – The Mechanic
Within McDougal's Service Station, where you can buy Deadshot Daiquiri, you can find a Klaus Summon, which you will need to use, and then Ping/L1 Klaus to stand by the dead mechanic next to the elevated car opposite the Armor wall-buy. The Mechanic will wake up, and you can guide the Mechanic to the orange lightning on the Service Station Rooftop.
Step 8: Complete the Vandorn Farm Ritual
In Ashwood, shoot the clock tower with Ol' Tessie's DG-2 Turret Barrel, and then shoot the charged clock tower with the Necrofluid Gauntlet and reload it to charge yourself with purple energy. Now, it's time to head to the Farmhouse in Vandorn Farm. In the Farmhouse on the southwest wall, you will find a clock that reads the time. Around the dining table with the corpses, you will need to stand on the etched Roman numerals that correspond with the clock (our clock read midnight, so our symbol was XII, behind the father). Standing on the correct symbol will cause the father's head to turn around, and once his eyes turn red, you will need to shoot him with the purple-charged Necrofluid Gauntlet.
Now, it's time to locate 4 ritual items:
- Ritual Item #1 – Tasty-Face Teddy Bear: Inside the Farmhouse, head upstairs and look to the southeast cabinet beside Stamin-Up, or the bed, where you can interact with this area to pick up Tasty-Face.
- Ritual Item #2 – Pa's Pigsticker: Within the Garage, look to the workbench at the north wall and interact with it to pick up Pa's Pigsticker.
- Ritual Item #3 – Junior's Fun-Face: Enter the Barn and head upstairs, where, at the east wall by the hay barrels, you will you can interact with Junior's Fun-Face.
- Ritual Item #4 – Ma's Chalice: Enter the Cellar beneath the Barn, and at the northwest wall, you will find a bathtub. Interact with the bathtub to get Ma's Chalice
Now that you have all 4 Ritual Items, there will be glowing circles within Vandorn Farm's central area. Interact with each of these circles to place the items you collected. Upon placing the last one, interact with it again to start a ritual where you must defend each of the items from zombies that will only attack the Ritual Items. You have to defend the items for 60 seconds, so use Kazimir grenades, the Saw Blade Trap, and Frenzied Guard to keep the zombies distracted.
Step 9: Launch the Zarya Cosmodrome Rocket
Return to Ashwood and shoot the clock tower with Ol' Tessie's DG-2 Turret Barrel, and then shoot the activated clock tower with the Necrofluid Gauntlet and reload to glow purple. Now, head from Ashwood to Zarya Cosmodrome, where you will see that the array towers are spinning extremely fast. With the Necrofluid Gauntlet, shoot one of them, then return to Ashwood to shoot the clocktower again, and then go back to Zarya Cosmodrome to shoot the other. Once both arrays have been shot, they will be noticeably much slower.
Now, enter the Control Room found by Wisp Tea, and you'll find two computer terminals flashing different shapes on the north wall. The symbols will change a total of 3 times, providing you with 6 unique symbols that can be translated through Pigpen ciphers here, but we've solved them for you. The symbols will only ever be 1 of 4 words:
- Engine (□□) translates to 04-13-06-08-13-04
- Launch (Ln) translates to 11-00-20-13-02-07
- Rocket (□>) translates to 17-14-2-10-04-19
- Weapon (V□) translates to 22-04-00-15-14-13
After finding the symbols that allow you to see what word you have, you can translate that word into numbers by using the alphabet. A is 00, and Z is 25. We've listed the combinations above so you don't have to do the math. With the numbers known, approach the northwest terminals, and from left to right, enter the numbers in order. When the terminal reads your number, shoot the red button on the screen to stop it. If you hit the wrong number, restart the entire step next round. If you've entered all numbers correctly, the rocket will launch.
Step 10: Shoot the Correct Projector Reels in Blackwater Lake
Once you have completed Step 7, Step 8, and Step 9, you can make your final trip to Ashwood to shoot the clock tower again with the DG-2 Turert, and then again with the Necrofluid Gauntlet (and reload) to turn it purple. Now, take Ol' Tessie to Blackwater Lake, where, at the west platform by the Mystery Box spawn, you will find a wisp. Interact with the wisp and then enter the Cabin and shoot the projector found in the theater room. This will cause the projection slides to show one picture at a time, and you'll need to memorize the order of these locations, and then shoot the projector film reels that can be found within these areas.
Here are the photos on the projector screen and where to find their corresponding reels:
- Front of the Cabin: Head up the stairs of the Cabin and look to the east wall, where you'll find a gramophone and a reel to shoot on the shelf to the left of the gramophone.
- Back of the Cabin: Face southeast and look below the railing stairs with your back to the pyramid, and the reel can be found below the outside stairs.
- Toolshed: Look to the east wall in the Toolshed, where you will find a film reel on the top shelf.
- The Fishing Hut: Enter the Fishing Hut and look up at the first rafters from the front door to find this reel.
If done correctly and in the correct order for your game, an audio cue will occur, and you can enter the Speed Cola room, upstairs in the Cabin, to find a lockbox by the bed with a glowing wisp. Interact with the box and then summon Klaus (found at the docks of Blackwater Lake), and then ping/L1 him at the box by the bed. Klaus will stand by the docks, and if you interact with him, you can initiate a vote to begin the boss fight.
At this point, you should be fully stocked with Perks, Weapons, Gobblegums, Armor, and anything else you need to survive to fight the boss.
Step 11: Interact with Klaus and Drive Ol' Tessie Through Wisps
Make sure Ol' Tessie is at Blackwater Lake and ready to drive through the Monolith Forest back to Janus Towers Plaza. Once you've spoken to Klaus, you will need to rush back to Ol' Tessie, where you will then need to drive into the orange wisps that spawn in the Monolith Forest, with the next location indicated by the white wisp that flies off. These wisps spawn slowly, and one at a time, and you are on an invisible time limit, so be sure to hit through them as soon as they appear, and avoid taking damage. You will need to hit 3 wisps in each of the roads that go from Blackwater Lake to Ashwood, and back to Blackwater Lake:
- Blackwater Lake to Janus Towers Plaza (Monolith Forest)
- Janus Towers Plaza to Vandorn Farm (Collapsed Tower)
- Vandorn Farm to Ashwood (Grounded Ship)
- Ashwood to Blackwater Lake (Lost Cabins)
After collecting all 12 wisps, ending at Lost Cabins, you will immediately be teleported into the boss room against Veytharion. If you failed this step, you can try again next round.
Step 12: Use Ol' Tessie to Kill Veytharion
The final step has arrived, and it's time to kill the Ashes of the Damned boss fight, Veytharion. This giant mess of flesh will shoot lasers at you, spin around, spit zombies, and fire missiles to kill you. It's a very difficult boss fight, but with Ol' Tessie, you might just survive. Players should stick with Ol' Tessie and use it to boost and ram into Veytharion repeatedly. The DG-2 Turret will also deal good damage, and if you have a player in the turret, aim for the open mouths, and the underneath carriage on Veytharion's body. Veytharion will sometimes go immune, and to damage him, you must ram him with Ol' Tessie, then collect the beam of light, and ram him while imbued with the beam of light. The most effective damage strategy is to ram Veytharion and shoot his glowing parts with the DG-2 Turret, or use the Necrofluid Gauntlet. This is a punishing boss fight, and you should focus on avoiding the red missiles, as they can deal lethal damage to you and Ol' Tessie. With Veytharion dead, you have completed the easter egg. Hooray!
After the cutscene, select 'Continue' instead of 'Exit' and interact with the Mysterious Object in the west area of Blackwater Lake in order to allow yourself to collect Relics in the new Cursed mode!

-
 OpenCritic Reviews
- Top Critic Avg: 66 /100 Critics Rec: 34%
- Released
- November 14, 2025
- ESRB
- Mature 17+ / Blood and Gore, Intense Violence, Strong Language, Suggestive Themes, Use of Drugs
- Developer(s)
- Treyarch, Raven Software
- Publisher(s)
- Activision

