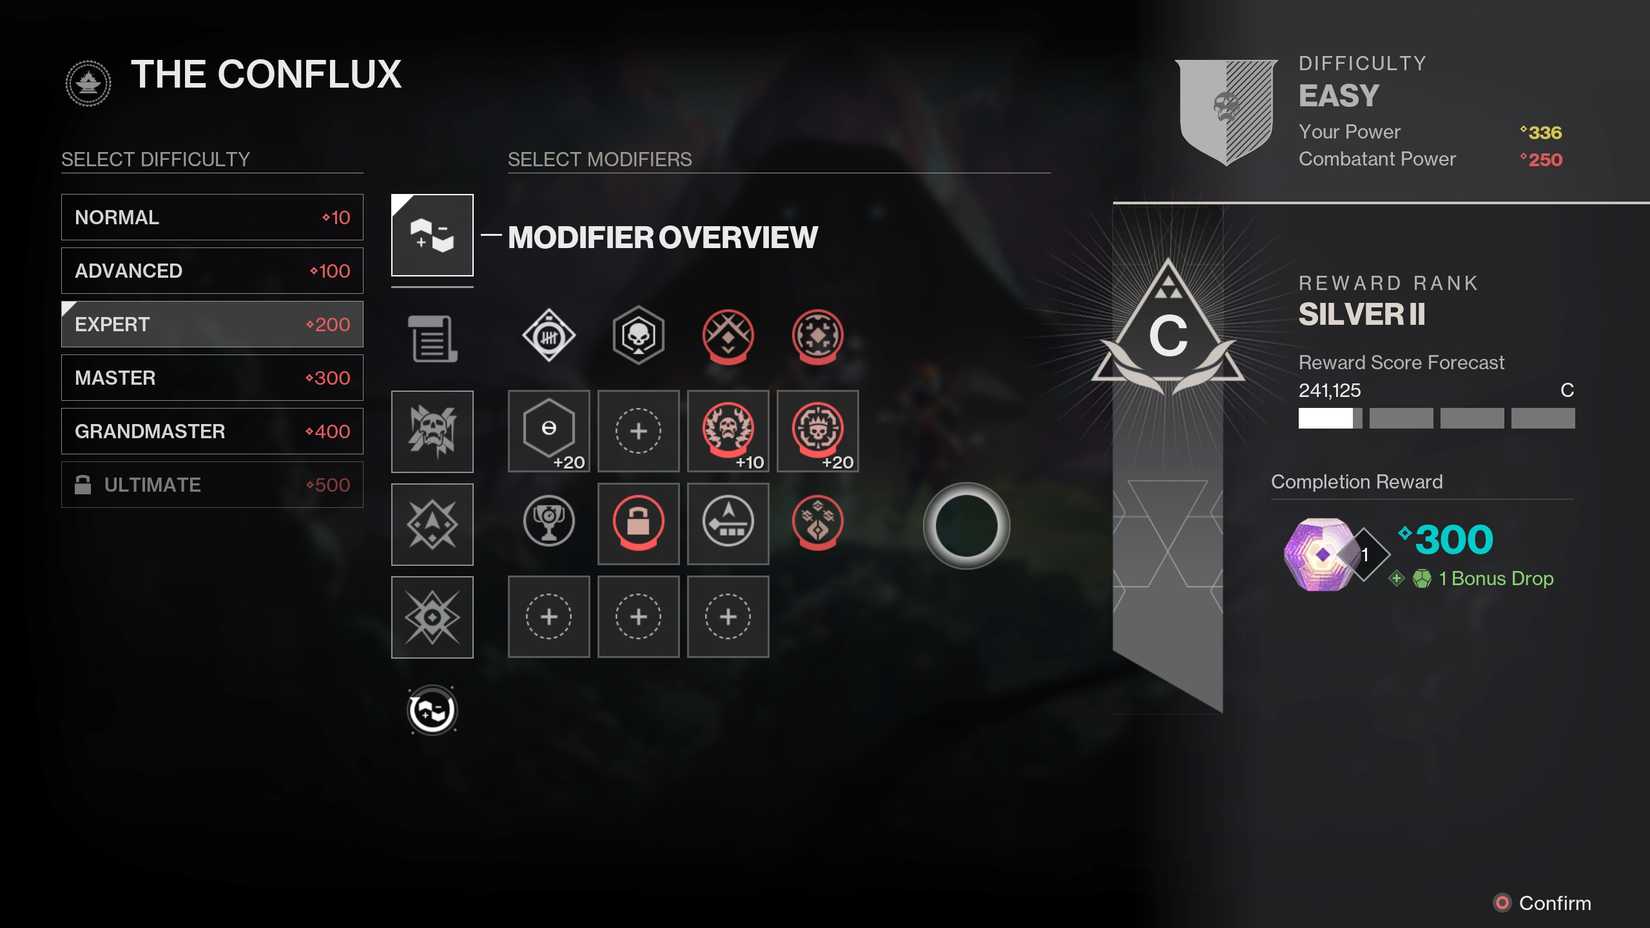
Achieving Power in Destiny 2 has changed with The Edge of Fate, and now players have to rely on the repetition and stable grind of the Portal, allowing players to enter into a multitude of activities, alone or with fellow Guardians, to reach the Power cap. However, the stronger a Guardian gets, the harsher the fight will be, meaning players need to use harder challenge modifiers with each run for every +10 Power. Increasing in Power might make activities harder, especially if it's required to use more challenging modifiers, but listed below are some of the easiest modifiers you should be selecting to achieve an A-rank, regardless of your level.
For most activities, players will just need to get the reward rank to B+ to achieve an A rank, so long as they are quick and efficient in defeating opponents and clearing encounters. However, to guarantee an A-rank, we've listed modifiers that will help push players to that goal with the right modifiers.
Best Advanced Modifiers for A Rank
Advanced is the difficulty players will want to be on until they reach Power 200, as players cannot get any further loot past 200 on Advanced. When it comes to modifiers, players want to aim their Combatant Power to be at least +20, and here are the modifiers we ran:
|
Modifier Name |
Modifier Type |
Description |
Why We Chose It |
|---|---|---|---|
|
Caltrops |
Bane |
Caltrops will appear on combatants. Affected combatants drop damaging elemental pools during combat and after being defeated. |
Caltrops are an easy Bane to deal with for long-range fights or melee builds, as the lingering damage isn't too impactful. |
|
Subtle Foes |
Challenge Modifier |
Certain foes are stealthy when at a distance. They become visible when near a Guardian. |
This provides enemies with no real advantage, as players can see their outline and health bars from a distance, and they become visible when you get close. |
|
Haste Trade-Off |
Challenge Modifier |
Moving quickly will slowly regenerate your health. Standing still will slowly deal damage. |
Since you will always be on the move, there's no harm in adding a modifier that will slowly eat your health if you stay still for too long. |
Best Expert Modifiers for A Rank
Expert is the difficulty players will be using from 200 to 300, as Expert difficulty only drops loot up to 300 Power, then it's time to move on. With Expert, players have additional modifiers to use, but again, it's all about focusing on staying 20 Power under the Combatant Power, and here's how:
|
Modifier Name |
Modifier Type |
Description |
Why We Chose It |
|---|---|---|---|
|
Rage and Caltrops |
Bane |
Difficult Banes Rage and Caltrops will appear on combatants. Rage: Affected combatants deal increased damage and have increased damage resistance as their health levels decline. Caltrops: Affected combatants drop damaging elemental pools during combat and after being defeated. |
Any Bane that features Caltrops is usually the best to go for, and we decided to pick Rage as although it might increase combatant damage, they're scarce, and it stops overwhelming effects from appearing with other Banes like Threaded and Avalanche. |
|
Hot Step |
Challenge Modifier |
When defeated, challenging combatants drop fire at their location. |
Most enemies are going to be defeated from a decent distance, so the fire that they drop isn't going to matter too much, especially when challenging combatants aren't that common. |
|
Glass Cannon |
Major Negative Modifier |
The player with the greatest number of final blows during an activity takes more incoming damage. |
The damage received really is minimal, so this is a free +20 Combatant Power to use. |
|
Equipment Locked Activity |
Loadout Restriction |
Equipment is locked during the entire activity. |
The most important activity modifier is Equipment Locked Activity, as it will lock the loadout, but the activities are so minimal that swapping to different loadouts really isn't necessary, and it's a huge multiplier bonus without impacting Combatant Power. |
Best Master Modifiers for A Rank
After hitting Power 300, it's time to head into Master difficulty, where players will spend the majority of their Power grind. Master is the main difficulty from 300 to 400, and here are the modifiers players should focus on for an easier time in battle:
|
Modifier Name |
Modifier Type |
Description |
Why We Chose It |
|---|---|---|---|
|
Rage and Caltrops |
Bane |
Difficult Banes Rage and Caltrops will appear on combatants. Rage: Affected combatants deal increased damage and have increased damage resistance as their health levels decline. Caltrops: Affected combatants drop damaging elemental pools during combat and after being defeated. |
Caltrops is easily the safest Bane to choose, and while the second Bane doesn't really matter, Rage is a nice choice for players who are confident that they can quickly and effectively eliminate the target before their higher damage output overwhelms. |
|
Subtle Foes |
Challenge Modifier |
Certain foes are stealthy when at a distance. They become visible when near a Guardian. |
This might make some enemies invisible, but they become visible again when players get too close, and considering difficult content will have players always moving, these invisible enemies won't stay hidden for long. |
|
Hot Step |
Challenge Modifier |
When defeated, challenging combatants drop fire at their location. |
Range isn't an issue when it comes to Hot Step combatants, as the fire that they spawn upon defeat isn't too deadly, and is completely avoidable at range. |
|
Glass Cannon |
Major Negative Modifier |
The player with the greatest number of final blows during an activity takes more incoming damage. |
For Solo activities and with the right builds, this modifier will feel like it has no true impact on gameplay, and is a free +20 Combatant Power. In activities with other Guardians, it's easier to manage thanks to revives. |
|
Equipment Locked Activity |
Loadout Restrictions |
Equipment is locked during the entire activity. |
Equipment Locked Activity is the best modifier for all difficulties, as it might lock your equipment completely, but it provides a huge surge in Challenge Multiplier without adding to Combatant Power. |
|
No Starting Ammo |
Starting Ammo |
Guardians start with no Special or Heavy ammo. |
It might be frustrating to lack Heavy or Special ammo, but there are plenty of ammo boxes in Solo Ops, and there are more than enough enemies to generate ammo in other activities, so it's a way to grab Challenge Multiplier without impacting Combatant Power. |
Best Grandmaster Modifiers for A Rank
Grandmaster is where players truly hit the endgame, and it's the difficulty that they will stay on for the rest of their grind to 450 Power. Grandmaster is best used at around 380 Power, or in the safer range from 400+, as Master stops being effective after 400 Power. Here are the modifiers players will want to run for their lengthy grind to 450:
|
Modifier Name |
Modifier Type |
Description |
Why We Chose It |
|---|---|---|---|
|
Screeber and Caltrops |
Bane |
Difficult Banes Screeber and Caltrops will appear on combatants. Screeber: When defeated, affected combatants will create multiple mini Screebs. Caltrops: Affected combatants drop damaging elemental pools during combat and after being defeated. |
Caltrops remain the best Bane for safe content, but Screeber might cause some concern since a bunch of mini Screebs is never a fun sight, especially with how explosive they are. However, staying airborne and shooting them will negate their effects pretty fast. |
|
Subtle Foes |
Challenge Modifier |
Certain foes are stealthy when at a distance. They become visible when near a Guardian. |
Invisible enemies will be no issue at Grandmaster, as players will have the confidence to eliminate them before they can even get a shot in. |
|
Hot Step |
Challenge Modifier |
When defeated, challenging combatants drop fire at their location. |
Fire dropped at a defeated enemy's location isn't an issue when one considers that it only occurs with challenging combatants, and that players can simply move out of the way of this low-damaging field. |
|
Equipment Locked Activity |
Loadout Restrictions |
Equipment is locked during the entire activity. |
Like previous difficulties, Equipment Locked Activity provides the best way to get additional score multipliers without increasing enemy strength, and most builds should be used to sustain players without needing to swap over mid-activity. |
|
No Radar |
HUD Modifier |
The radar is invisible. |
The radar is the most non-essential element of a HUD, as players only need their health, ammo, and abilities to see, so why not get rid of it for easy score multipliers? |
|
Brawn |
Health Model Modifier |
Health is massively increased but does not regenerate. Defeating combatants recovers a small amount of health. |
This is another easy modifier for Challenge Multiplier, as players have a huge Health pool that can be increased simply by defeating enemies in the activity or by using other healing abilities. |

-
 OpenCritic Reviews
- Top Critic Avg: 84 /100 Critics Rec: 88%
- Genre(s)
- FPS


