


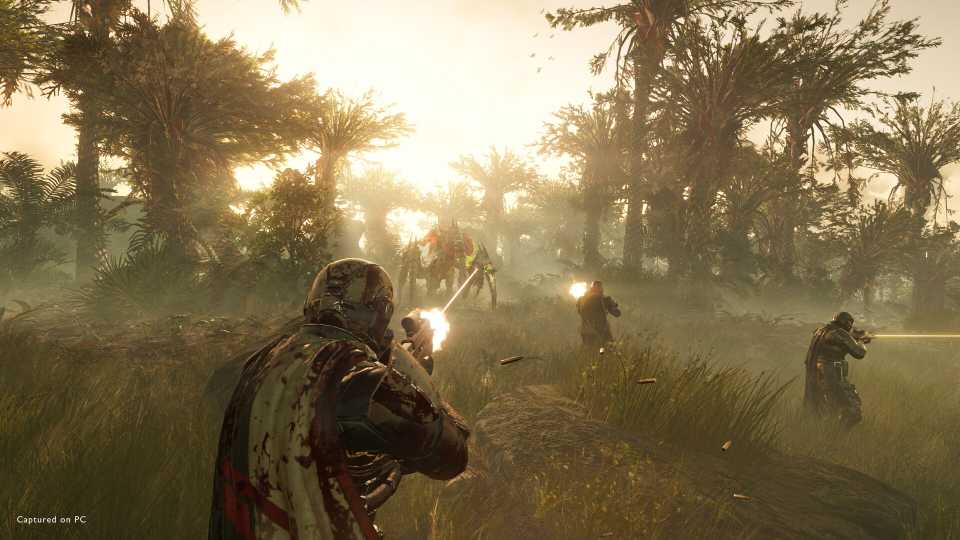
Helldivers 2 is an intense third-person shooter where players must put their lives on the line to defend Super Earth from deadly alien creatures. There are three main enemy factions that players will face in Helldivers 2: the insectoid Terminids, the Terminator-like Automatons, and the alien Illuminate.
Terminids are essentially the bug faction and can be found in missions on the right side of the Galactic War Map, Automatons are lethal bots that are found in missions on the left side of the Galactic Map, and the Illuminate have dominated the bottom portion of the Galactic War Map. These vicious factions are attacking Super Earth from every direction, which is why players need to familiarize themselves with their weaknesses to defeat them once and for all.
Updated by Jeff Brooks on September 9, 2025: This guide has undergone a major overhaul since it was first written at the game's launch. Existing enemy entries have been enhanced and expanded to include up-to-date strategies and counters, new Terminid and Automaton units have been added (including their new subfactions), and the entire Illuminate faction has been added, breaking down every enemy unit's weaknesses and locations in the game.

Helldivers 2: All Warbonds, Ranked
Here are all of the Warbonds in Helldivers 2, ranked according to practicality to help players figure out which ones to get first.
All Automaton Units in Helldivers 2

The table below details all enemy types in the Automaton faction, along with their weaknesses and on which difficulties they can be found. Automatons possess a few variant subfactions, which modify existing units slightly to change how they behave on the battlefield:
- The Jet Brigade adds jump packs to many of their units, adding greater mobility and aggression to their behaviors.
- The Incinerator Corps adds fire-based weaponry to many of their units. Armor sporting fire resistance can be very helpful when dealing with this subfaction.
|
Automaton Unit |
Weakness |
Location |
|---|---|---|
|
Troopers (Raiders, Marauders, Brawlers) 
|
These are the lowest-tier enemies and are armed with pistols, assault rifles, energy blades, machine guns, jump packs, rocket launchers, and/or grenades. Easily dispatched with standard weaponry, their strength lies in their numbers. They are capable of signaling for an Automaton Dropship to bring reinforcements. |
Found throughout bot missions on Trivial Difficulty (1) and above. |
|
Commissar 
|
Commissars are often found alongside Troopers, and their first action is typically to call in reinforcements. Avoid melee, as their red blade can deal serious damage. |
Found along with Troopers throughout bot missions from Trivial (1) difficulty and higher. |
|
Berserker 
|
Berserkers are powerful robots with chainsaws for arms. They may not be the easiest creatures to kill, but if you aim for the head and red torso, you can inflict critical damage. Avoid close-range encounters with Berserkers, as they'll dispatch you quickly. Stun and Gas effects are particularly effective at halting (or redirecting) their aggression. |
Found in bot missions on Medium (3) Difficulty and above. |

|
Scout Striders are quick and deadly mobile turrets. They are exposed from the sides and rear to light penetrating fire. Their legs and torso are equipped with medium armor, so medium pen weaponry can quickly dispatch them. Grenades are also a strong option to dispatch quickly. |
Found in bot missions from Medium (3) difficulty and beyond. |
|
Devastator (Standard, Heavy, Rocket) 
|
Devastators are slightly larger than Berserkers. When encountered, take cover, as they are unerringly accurate. Can be found wielding arm cannons, machine guns, portable shields, or shoulder-mounted rockets. Aim for headshots to bring them down quickly. Removing their arms will effectively disarm them. |
Found throughout bot missions from Trivial Difficulty (1) to Helldive. Sometimes found in a special objective called Eliminate Devastator. |

|
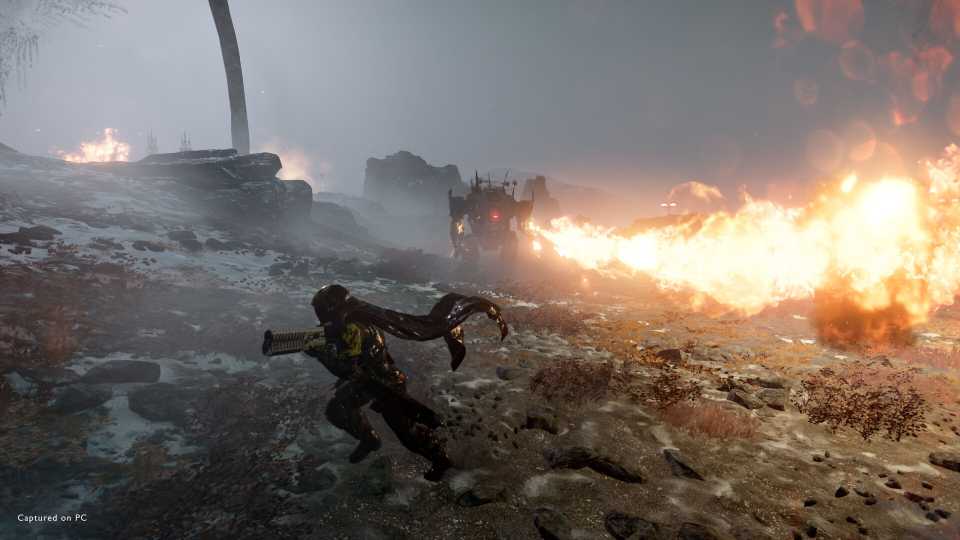
Hulks are powerful and extremely dangerous bots with a wide physique. They can be encountered wielding rocket launchers, laser cannons, flamethrowers, buzzsaws, incendiary cannons, and jump packs. Best to dispatch from range. Players should use heavy weapons, explosive Stratagems, or grenades to kill them. Aim for their red eye with medium-pen weaponry (or stronger), or their rear vent with light-pen weaponry. One Thermite grenade attached to a Hulk will kill it, as will a single Quasar Cannon blast. |
Found in bot missions from Medium (3) difficulty as targets in Eliminate Automaton Hulk missions. Found among patrols and at Points of Interest/objectives/bot drops in higher difficulties. |

|
The Tank is incredibly tough but has a few notable weaknesses: its rear vent, tracks, and rear chassis are all medium armor. To defeat this enemy, players should use strong explosive stratagems like Orbital Precision Strike or the Eagle 500kg Bomb, or aim medium-pen weapons fire at its weak points. Destroying its tracks will render it immobile. One Thermite or Recoilless Rifle impact are extremely effective. Annihilator Tank: Armed with a powerful laser cannon capable of killing Helldivers in one hit. Shredder Tank: Armed with a machine gun battery, rather than the laser cannon. Barrager Tank: Armored with a large missile battery that can fire off over a dozen missiles at once. |
Can be found in bot missions on Hard (5) difficulty and above. |
|
Dropship 
|
The Dropship delivers Automaton units to the battlefield after reinforcements are called. Certain anti-tank weapons, like the Recoilless Rifle, Quasar Cannon, or EAT-17 can destroy a Dropship with a direct hit to an engine. The Spear can destroy a Dropship with an impact anywhere on the unit. If destroyed before deploying units, it can eliminate the enemy units the Dropship is carrying. Otherwise, firing explosive rounded into the belly of the Dropship can dispatch many units before they're deployed. |
Featured in all bot missions from Trivial (1) difficulty and above, they will deliver more Automaton troops to the battlefield if signaled via red flare. |
|
Gunship 
|
This hostile ship patrols the skies and lights up red when it spots Helldivers. Its engines are its weakpoint, though they each have individual health pools. Target an engine with medium pen (or higher) to destroy, or target Gunships with strong support weapons to bring them down. Two shots with the Autocannon to an engine, one shot with the Quasar Cannon to the body, etc. A Rocket Sentry is also particularly effective at clearing the skies. |
Found on Hard Difficulty (5) and above, these units can either operate as isolated patrols or as spawning units from Automaton Gunship Facilities. Destroy the Gunship Facility via deployed Hellbomb to stop them from spawning continuously. |
|
War Strider 
|
These dangerous mechs have no exposed weakpoints, requiring dedicated anti-armor weaponry, such as Thermite, Recoilless Rifle, or Railgun, or explosive Orbital/Eagle stratagems. It fires dual plasma cannons and launches volleys of grenades, sewing chaos on the battlefield. Prioritize this unit when possible. |
Spawning on Extreme (6) difficulty and above, these dangerous foes will be found among patrols and Automaton base defenses. |

|
The Factory Strider is the Automaton's largest and most dangerous unit (so far). Armed with a large plasma cannon on its back (capable of long-range attacks) and a mounted minigun turret on its chin (chin minigun can be destroyed with medium-pen weapons fire). Weakpoints include the medium armored belly that deploys a standard Devastators every ~30 seconds, leg joints, and the small red light on its head. It can sustain a serious amount of damage, capable of weathering multiple Eagle 500kg Bombs, but a well-aimed Recoilless Rifle impacting the red light on its 'face' (or sustained medium-pen weapons fire on its belly) will bring it down quickly. Strider Jammer variant: This variant comes with a Signal Jammer attached to its back as part of the Strider Convoys mission type, preventing calling down Stratagems. |
Encountered on Challenging (4) difficulty as a specific objective, this unit will appear among general troop movements on higher difficulties. Despite its size, it can be flown in via Dropship. |

Helldivers 2: Best Weapons and Stratagems for Terminid Cave Missions
Players will need to bring specialized gear and stratagems if they want to take on the treacherous tunnels of Terminid Hive Worlds in Helldivers 2.
All Terminid Units in Helldivers 2

The table below comprises a list of all enemy types in the Terminid faction, along with their weaknesses and locations. Variant subfactions (Mutations) include the Predator Strain, the Spore Burst, and the Rupture Terminids.
- The Predator Strain adds more aggressive Predator Hunters and Predator Stalkers, while also adding Predator Stalkers to the general patrol/base unit pool, rather than only spawning from designated Stalker Lairs. Weapons with stronger stagger are useful for keeping these aggressive Terminids at bay.
- The Spore Burst Terminids are pink and white, with some kind of fungus growing from their bodies. They are noticeably easier to kill, and upon death, they explode in spores, damaging anything adjacent to them. They are made up of variants of the Scavenger, Hunter, and Warrior units.
- The Rupture variants are the newest added to the Terminid faction, able to burrow beneath the ground to remain out of sight. Rupture variants include the Rupture Warrior, Rupture Spewer, and Rupture Charger. More on these enemies below.
|
Terminit Unit |
Weakness |
Location |
|---|---|---|
|
Scavengers 
|
These are the smallest of the Terminid enemies and are easily killable with one to two bullets. |
Found throughout bug missions from Trivial (1) difficulty to Super Helldive. |
|
Pouncer 
|
These are like smaller versions of the larger Hunters. Easily killed like Scavengers by small-arms fire, but worth prioritizing due to their aggressive jumping tactics. |
Found on bug missions from Easy (2) difficulty and higher. |
|
Bile Spitter 
|
Bile Spitters spit little globs of bile at Helldivers, but they're otherwise as vulnerable as Scavengers and Pouncers. Easily killed with small-arms fire, they explode on death to damage anything around them. |
Bile Spitters will show up on Trivial (1) difficulty and higher. |
|
Hunters 
|
Hunters are slightly larger than their weaker Pouncer cousins, able to leap far distances and deal deadly melee damage. It's possible to shoot them down with light penetration. |
Appear in various locations on bug missions as part of a swarm from Medium (3) difficulty and higher. |
|
Warriors 
|
These pesky bugs are able to take a few more shots than the lesser Scavenger, but they can still be quickly dispatched with some clean headshots or a steady stream of small-arms fire. Bile Warrior variant: these warriors have some green bile coloring to them, and they will explode with bile when killed. Alpha Warrior variant: A variant with a larger health pool that is spawned by the Alpha Commander. |
Warriors will be encountered on bug missions from Trivial (1) difficulty and up, making up the 'standard' enemy unit of the faction. Able to be spawned by Brood Commanders. |
|
Hive Guard 
|
Hive Guards are tougher to take down than normal bugs, as they sport medium armor on their head and front legs (the dark portions). When shot at, they often turtle up, covering the rest of their vulnerable parts (the pale skin). Medium-penetrating weapons can chew through their armored sections, but light pen is sufficient to bring them down when landing shots on their pale skin. |
Hive Guards begin showing up on Easy (2) difficulty and higher, intermixing with other regular Terminid units on the battlefield. Able to be spawned by Brood Commanders. |
|
Stalker 
|
These devious enemies turn invisible and are excellent ambushers, able to ragdoll Helldivers with their lashing tongue attacks (after which they quickly rush forward to kill). Weapons with stagger, like most shotguns, are excellent at keeping these enemies at bay. |
Found throughout bug missions on Challenging (4) difficulty and above. Typically, Stalkers spawn from Stalker Lairs, though their Predator Strain variants can be part of the general enemy pool on a given mission. When encountered, try to track them down to their nest to destroy it and stop them from spawning. |


|
These big, heavy bugs move slowly and spit lethal jets of bile on the players. Their face is a major weak spot, though their green (Bile Spewer) or orange (Nursing Spewer) sacks can also be popped to damage surrounding enemies. On Extreme (6) difficulty and higher, they gain the ability to fire off bile bombs from range. |
Found throughout bug missions from Medium (3) difficulty and higher. Bile Spewers only appear during night missions, and Nursing Spewers only appear during day missions. |

|
Chargers can easily break up Helldiver formations with their dangerous charge ability, dealing high-impact damage. Dedicated anti-tank weaponry like the Recoilless Rifle or Quasar Cannon can kill them with a single headshot. Otherwise, their exposed tail is only lightly armored. They are vulnerable to stun and gas effects. Spore Charger Variant: emits spore clouds, reducing visibility in the vicinity. Once defeated, the spore effect dissipates. Behemoth Variant: a more heavily armored version of the Charger, it can still be killed with dedicated anti-tank weaponry, but it can take more hits from lesser weapons (Flamethrower, Arc Thrower) due to an increased health pool. |
Found on Medium (3) difficulty missions as a dedicated target; Chargers (and their variants) appear on higher difficulties more frequently among the general Terminid enemy pool. |
|
Brood Commander 
|
These large creatures are lightly armored, so they can be damaged by all weapons. They can summon Warriors and Hive Guards, so they should be prioritized. It’s best to shoot at them from a distance and aim for the head, as once they are dying (head removed), they will charge forward, slashing and killing, before succumbing to their wounds. Alpha Commander variant: This variant is essentially the same as a Brood Commander but with a larger health pool and able to spawn Alpha Warriors (variants of Warriors with greater health). |
Brood Commanders can appear as early as Trivial (1) difficulty as a mission objective. They appear more frequently in higher difficulties, found as part of regular Terminid patrols and outposts. |

|
Bile Titans are one of the most formidable Terminids. They can crush Helldivers with their legs, and their Bile attack can melt Helldivers in moments. Use powerful Stratagems and anti-tank weapons to bring them down. A well-placed Eagle 500kg Bomb or a headshot with a Quasar Cannon, Recoilless Rifle, or EAT-17 can eliminate them. Sentries like the Rocket or Autocannon Sentry can quickly dispatch as well. If you pop their bile sac, they lose the ability to spit bile, but they become more aggressive, so fair warning. |
Bile Titans can be encountered on Challenging (4) difficulty as a mission objective, and they spawn normally from Extreme (6) difficulty and above. On Suicide Mission (7) difficulty and higher, Bile Titan Nests can appear in Terminid Heavy/Mega Nests. Bile Titan bug holes can't be closed by grenades like normal bug holes, requiring greater force to close. |

|
Shriekers are weak flying Terminids most often encountered in small groups. They will typically hover at medium range, swooping down to inflict slashing damage. They can easily be killed with light pen weapons, but if left unchecked, they can become a real nuisance. If killed, their body can still deal some damage on impact, so beware of falling Shriekers. |
Encountered on Challenging (4) difficulty and above, Shriekers are most often found spawning from Shrieker Nest side objectives, where they will continue to spawn until the Nests are destroyed. They can also be found roaming independently on planets with the Shrieker Patrol effect active. |
|
|
Impalers are one of the most dangerous enemies encountered on the bug front. They are heavily armored, and they attack by rooting in place, driving their deadly tentacles into the ground to erupt up to 150m away to attack Helldivers. Shooting the Impaler tentacles can damage them, but it's mostly a waste of ammo. When rooted in place, they are vulnerable; their armored plating retracts to reveal their fleshy 'face' underneath. Sustained small-arms fire will gradually damage this fleshy exposed area, but a well-placed anti-tank attack just above their eyes, like from the Recoilless Rifle, can kill them in one shot. |
Impalers can appear on Hard (5) difficulty and higher. |

|
The Dragonroach, also known as the 'Bile Dragon,' is essentially a flying Bile Titan. They spit streams of bile in flyby and hovering attack patterns. Their main weakpoint is their face, exactly like a Bile Titan, with a Quasar Cannon or EAT-17 able to one-hit kill them with a direct headshot. An Orbital Railcannon Strike will also kill them in one hit. They can take a surprising amount of damage from weaker weaponry and cause real chaos on the battlefield. Prioritize this target with dedicated anti-tank firepower if possible. |
Dragonroaches can spawn on Hard (5) difficulty or higher and operate as a patrolling unit. |

|
Hive Lords are an enormous Terminid enemy, meant more as a hazard to avoid rather than one to take on directly. It can be killed, but it takes such dedicated, sustained damage with overwhelming firepower that it is rarely worth the effort. Assault with Eagle Strafing Runs, 500kg Bombs, EATs, Portable Hellbombs, Orbital 380 Barrage—anything and everything you've got—over a long, sustained effort. |
Hive Lords can appear on Suicide (7) difficulty or higher and only as a stated mission modifier. As of their release, they are only present on Gloom-infested Terminid planets. |
Rupture Strain Terminids
The Rupture strain is the newest Terminid subfactions added to the game. It appeared during an expedition into the Gloom, deep in Terminid space. Rupture Strain Terminids are distinct in that they can burrow underground, able to approach beneath the surface to limit how much damage they can take on approach.
|
Rupture Strain Variant |
Weakness |
Location |
|---|---|---|
|
Rupture Warrior 
|
Rupture Warriors are deadly at close range. They will burrow on approach and attack as they resurface. They sport medium armor covering their head and front legs, but the rest of their body can be damaged with light-pen weapons fire. Their tail, in particular, is a great weakpoint, as they will sometimes stick it straight up in the air on approach. Explosive and gas damage will force Rupture Strain variants to the surface. Force them to the surface and aim for headshots with medium-pen weapons fire—or anywhere else on their body with light-pen weapons fire—to quickly dipatch. |
Rupture Warriors are encountered on Gloom or Gloom-adjacent planets on Trivial (1) difficulty or higher. |
|
Rupture Spewer 
|
Rupture Spewers operate similarly to Rupture Warriors, burrowing until they pop up from the ground to spit globs of bile that explode on impact. Explosive or gas damage will force them to surface early, and light-pen weapons fire will quickly dispatch. |
Rupture Spewers are currently only encountered on Gloom or Gloom-adjacent planets on Medium (3) difficulty or higher. |
|
Rupture Charger 
|
Rupture Chargers can be a major disruptor due to remaining hidden beneath the surface on approach. Force them to the surface with explosive or gas damage (Speargun or Grenade Launcher are especially effective). Rupture Chargers have slightly stronger armor on their faceplates compared to standard Chargers, but anti-tank weaponry such as the Recoilless Rifle or Quasar Cannon are still the best responses to such a threat. A direct shot to the head will put them down. Otherwise, they possess the same fleshy tail on their rear, the underside of which can be damaged with light-pen weapons fire. Flank it to damage this vulnerable spot. Once the tail pops, it will die soon after. |
Rupture Chargers are currently only encountered on Gloom or Gloom-adjacent planets on Challenging (4) difficulty and higher. |

Helldivers 2: Best Weapons to Use Against The Illuminate
Here are the best weapons per category for dealing with all the units of the Illuminate faction in Helldivers 2.
All Illuminate Units in Helldivers 2

The Illuminate is the third faction of Helldivers 2 and the returning third faction from the original Helldivers. They generally make up the southern front on the Galactic Map, and they're known for their strong shielded units, powerful tech, and swarming numbers.
|
Illuminate Unit |
Weakness |
Location |
|---|---|---|
|
Voteless 
|
The Voteless are former Super Earth citizens warped by Illuminate experiments. They function as essentially fast zombies, and they're very easy to dispatch—their strength lies in their numbers. Sentries, Gas, and Fire-based attacks do well against the hordes of Voteless. Shoot out their legs to slow them down. |
Found on the Illuminate front from Trivial (1) difficulty and higher. They make up the bulk of Illuminate ground forces. |
|
Watcher 
|
The Watcher is a flying probe with a weak electrical attack and the ability to call down reinforcements by shooting up a purple signal flare. Prioritize shooting them out of the sky before they can call in more troops. |
Watchers appear at every difficulty on the Illuminate front, as they're the only Illuminate unit capable of calling in reinforcements. |
|
Overseer 
|
Operating as the commanders of the Illuminate front, the Overseers often accompany the Voteless hordes as their commanders. They possess powerful ranged and melee attacks, and they have surprisingly resilient defenses. The standard Overseers are typically found wielding energy staves and/or energy shields, and they are able to throw grenades. They're dangerous at range, but they're even more deadly in melee. Their armor is layered, meaning repeated damage (like from an assault rifle) will bring them down faster than single, powerful attacks like from a grenade. Headshots with medium or heavy-pen weapons do strong damage to them, though body shots will bring them down quickly with a rapid-fire weapon. A single headshot from the Senator sidearm will kill them in one hit. Same with a single headshot from the Anti-Materiel Rifle. Elevated Overseer variant: This Overseer variant can be found flying on a hover pack and shooting a plasma weapon. Same weaknesses as the standard Overseer, but they're harder to hit due to their added mobility. Damaging their hover pack can also kill them. Crescent Overseer variant: This Overseer variant wields a plasma cannon that operates like a mortar, firing high into the air to bombard their target. They can often be found taking up the rear of Voteless hordes, making them more difficulty to take down, but they should still be prioritized whenever possible. |
Overseers are present on Trivial (1) difficulty and higher. |
|
Fleshmob 
|
The Fleshmob appears as a monstrous Voteless experiment gone wrong. This enemy will charge recklessly toward their target, even ignoring other Helldivers along the way, and their massive health pool means they are able to take a serious amount of damage before going down. Their limbs can be removed to reduce their effectiveness in combat, but with similar effort, they can be killed outright, so it's best to simply target them with whatever weaponry or ordnance you possess. Arc weapons like the Arc Thrower can stun them, fire damage from Incendiary Grenades (for example) does great at reducing their health pool, Gas will disorient them, and explosive damage deals increased damage to their overall health pool. |
Fleshmobs can appear on Trivial (1) difficulty, offering a serious challenge to novice Helldivers in the field. |

|
Harvesters are the iconic enemies of the Illuminate faction. When attacked, they will deploy a large bubble shield that can absorb all damage, they can fire a short-range electrical shock at close range, and they can blast a long-range beam of energy that can vaporize a Helldivers with its deadly sweeps. Rapid-fire weaponry (Stalwart, Liberator) excels at bringing down Illuminate shields, after which their body can be damaged. The 'horn' above their blue eye acts as their shield generator; destroying it with weapons fire will prevent their shield from recharging. The 'horn' below their eye will electrocute Helldivers at close-range; destroying it with weapons fire will prevent this attack. Harvester weakpoints include their blue eye and the fleshy joints where their legs meet their main body (both medium armor). Medium-pen Support Weapons like the Autocannon, AMR, Machine Gun, and Laser Cannon can all dispatch an unshielded Harvester when targeting their hip joints (where their legs meet the main body). The Arc Thrower will stunlock a Harvester; it might take a while to bring them down, but stunning then in place and preventing their attacks is valuable in its own right. A single shot to the hip joint from anti-tank weaponry like the Recoilless Rifle or Quasar Cannon can also bring it down. |
Harvesters will appear on Medium (3) difficulty and higher. |
|
Warp Ship 
|
Warp Ships function as the Illuminate spawner when stationary (like bug holes or bot fabricators) and as transport for reinforcements (like Automaton Dropships). Warp Ships come with their own shields, similar to Harvesters. Destroy Stationary Warp Ships: Some stratagems like the Orbital Gas Strike or Orbital Precision Strike can destroy them even with shields up. To destroy them with weaponry, first, bring the shields down with rapid-fire weapons or Stratagems. Once the shields are down, they can be destroyed like bug holes or bot fabricators—toss a grenade into their glowing entrance to obliterate them. Destroy Flying Warp Ships: For Reinforcement Warp Ships, they can be shot out of the sky by targeting their bottom center with anti-tank weaponry (after shields are down). A shot from the Recoilless Rifle or Quasar Cannon to this vulnerable section can bring them down. If destroyed before they warp in enemies below them, it functionally keeps those reinforcements off the battlefield (like shooting down an Automaton Dropship before it deploys its units). |
Warp Ships appear on Trivial (1) difficulty and higher and function as troop transports, teleporting Illuminate reinforcements to the battlefield after they've been called in by Watchers. |

|
Stingrays (also referred to as Interlopers) are a fighter jet of sorts for the Illuminate. They patrol the skies over the battlefield, and after spotting Helldivers, they will swoop down for a strafing run. This attack is shown on the ground, highlighting the soon-to-be-attacked area in blue. After the first pass, they will fly away a good distance before circling back for another strafing run. Medium-pen Support weapons are especially effective at bringing them down, though due to their speed, the best time to attack them is in the wind-up and during their strafing run. The Machine Gun, Laser Cannon, or Autocannon are strong choices. The WASP Launcher is especially effective, only requiring 3–4 lock-on hits to bring a Stingray down. |
Stingrays can be encountered on Trivial (1) difficulty missions all the way up to Super Helldive (10). |
|
Leviathan 
|
The Leviathan is a gigantic ship that patrols the skies during missions with the Leviathan Blockade modifier. They eventually leave the map after their patrol, though they will continue appearing throughout the mission. They sport eight laser cannons attached to their 'fins' (four on each side). They also drop plasma bombs directly below. After spotting Helldivers when flying overhead, they unleash their attacks on the area below. Anti-tank weaponry such as the Recoilless Rifle or the Spear can bring them down, but it takes multiple rounds (about eight to nine Recoilless Rifle shots). Bringing a Leviathan down isn't necessarily worth the effort, though, as they will continue spawning and leaving the battlefield throughout the mission. Taking cover behind buildings and breaking line of sight is typically the best way to avoid a Leviathan's fury. Despite being a unit that can be destroyed, they are easy to think of as a hazard, rather than an enemy worth engaging with directly. |
Leviathans begin appearing on Hard (5) difficulty on missions with the Leviathan Blockade modifier. |
Most images have been sourced from the Helldivers 2 fandom wiki and the official PlayStation Helldivers 2 store page.

Helldivers 2


-
 OpenCritic Reviews
- Top Critic Avg: 83 /100 Critics Rec: 91%
- Released
- February 8, 2024
- ESRB
- Mature 17+ / Blood and Gore, Intense Violence, In-Game Purchases, Users Interact
- Developer(s)
- Arrowhead Game Studios, Nixxes
- Publisher(s)
- Sony Interactive Entertainment, PlayStation Publishing


WHERE TO PLAY


- Platform(s)
- PlayStation 5, Xbox Series X, Xbox Series S, PC
- Genre(s)
- Third-Person Shooter, Extraction Shooter, Action, Science Fiction
- OpenCritic Rating
- Strong