

Despite being packaged as a handheld device, the Steam Deck is a powerful and versatile machine that can easily handle recently launched games. However, as with most current-gen hardware, the system's storage space with big video games and apps will get used up.

Steam Deck: How To Customize Haptics
Steam Deck users can adjust the haptics to their liking; Here's how it's done.
The Steam Deck is available in two versions if users prefer the cheaper refurbished LCD options and the OLED version. The OLED model comes in 256GB, 512GB, and 1TB. The LCD model is also currently sold in three models offering different storage options. Users can buy the 64 GB, 256 GB, and 512 GB. All three versions are excellent choices, but the entry-level 64 GB model is unsurprisingly more limited in installing large games. Taking free-to-play Apex Legends as an example, the game takes at least 70 GB to install, so the smaller model isn't sufficient. Thankfully, there is a way users can upgrade their Steam Deck and increase its storage. This guide will explain the steps and items needed to expand the Steam Deck's storage space.
Updated September 27, 2024 by Michael Llewellyn: This guide already covered how to use a microSD card as a second install location for your games. This is still the best and most recommended method for expanding your storage on the Steam Deck. However, connecting an external HDD when using the handheld on a docking station is another viable method. This guide has been updated to include the steps for adding an external HDD for the Steam Deck.
Items Needed To Expand The Steam Deck's Storage

Users will need a micro SD card to expand the Steam Deck storage. Thankfully, the reports have been good when using it to boot games. With solid - but not SSD speed - loading times, a decent micro SD card is vital for Steam Deck users, whether they use a 64 GB or a 512 GB model.
A recommended card for expansion is the above Samsung EVO micro SD A2 EVO Plus or the Pro. It's more reasonably priced than the SanDisk cards and can increase the Steam Deck's capacity to 512 GB. However, downloading games to the micro SD can be more time-consuming than if stored on the SSD. If one has a larger model, it's ideal for storing smaller titles or playing games with emulation on the Steam Deck for older software.
How To Install A Micro SD Into The Steam Deck
The Steam Deck has a micro SD slot outside of the device. So there's no fiddling around and taking the machine apart to expand the capacity and get more out of it. Use the following steps to install the new SD card:
- Locate the micro SD card slot on the bottom of the device.

- Gently push the card into the slot with the logos facing up, the metal strip facing down, and the smaller end of the card to be inserted first.
- The card should click into place - to remove the card, carefully press it inwards until a click indicates it's ejected from the machine.
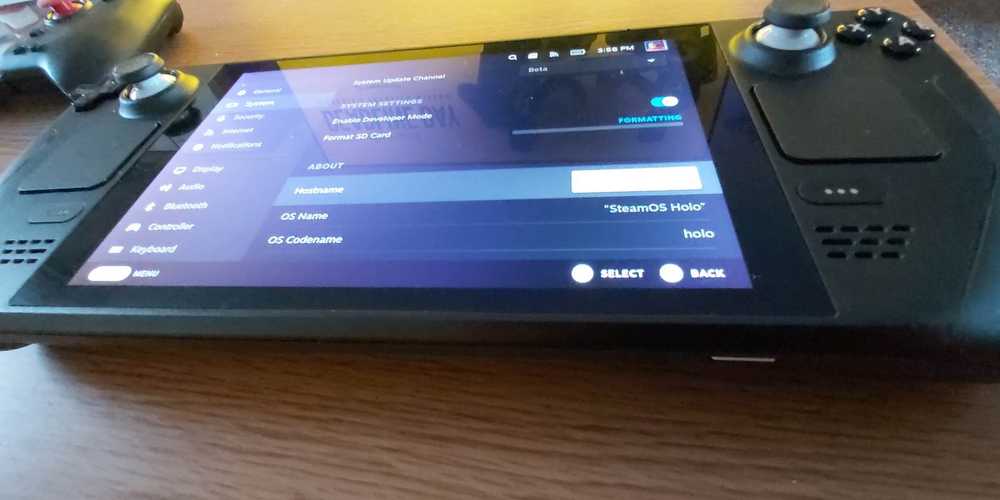
- Now, press the Steam button to access the settings tab.
- Scroll down to the System tab.
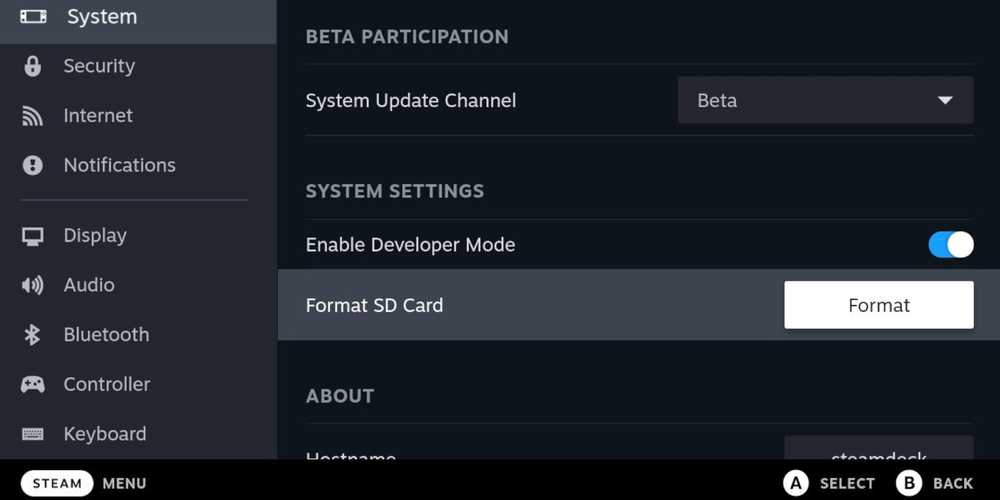
- Then, click Format SD Card.
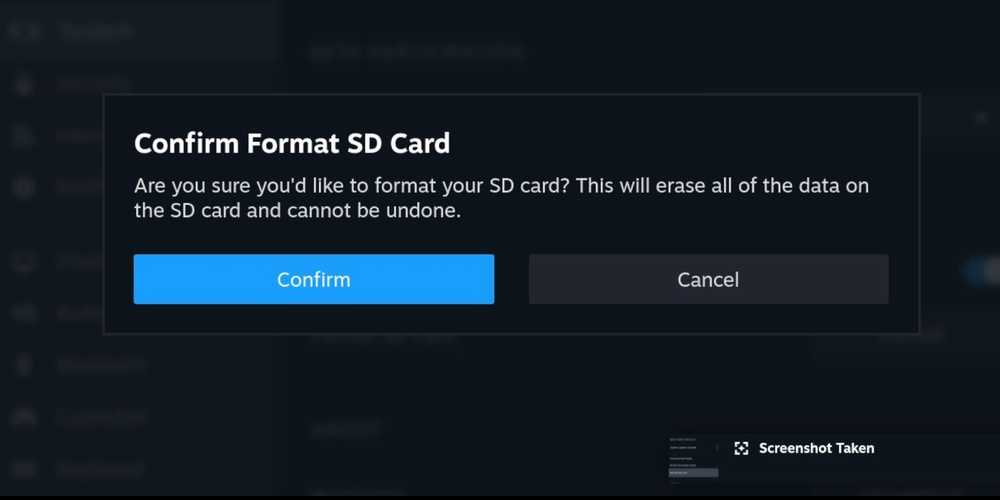
- Press confirm, and the Steam Deck will indicate that it's wiping the card ready for the Steam Deck's storage.
- When the process has finished, go back into settings and scroll down to the Storage menu.
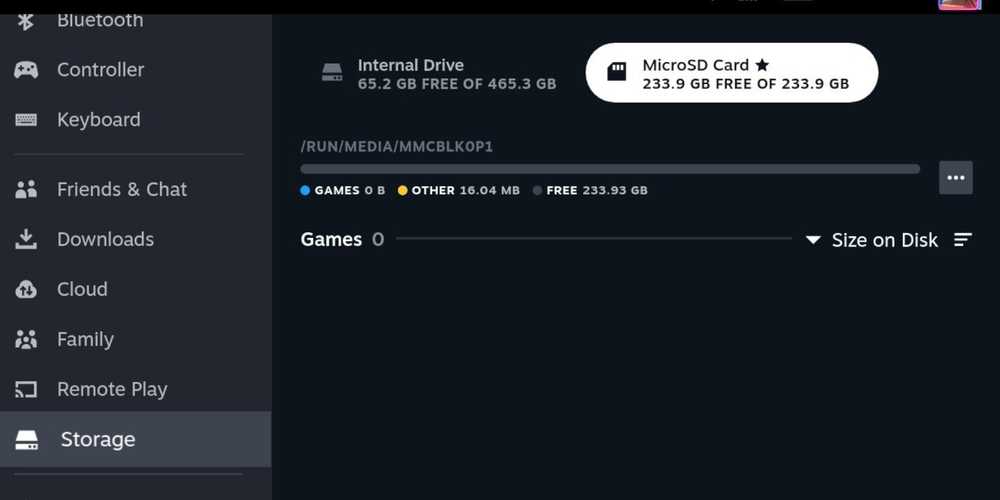
- The micro SD card should appear next to the Internal Drive for use.
That's everything needed to expand the Steam Deck's capacity. As mentioned above, be aware that downloading high-capacity games will take longer than the SSD, but playing the games from the card will give the user more than a satisfactory experience.
Connecting An External Hard Disk Drive
An external hard drive is an alternative method to installing a microSD card. However, it's better to keep the Steam Deck docked and use it like a desktop PC to do this. A USB flash drive will also work, but an external HDD is more reliable and durable than a USB stick. Use the following steps to connect an external HDD to Steam Deck:
- You'll have to obtain a USB-C compatible HDD.
- A docking station for the Steam Deck with multiple USB ports.

- Connect the Steam Deck to the docking station.
- Use an HDMI lead to connect the dock to a TV or a monitor.
- Connect the Steam Deck to the mains.
Switch To Desktop Mode
- Press the Steam button and select Power.
- Switch to Desktop Mode.
- With the Steam Deck in Desktop Mode, connect the external HDD.
- Click on the Steam icon in the bottom left corner.
- Select System.
- Then open KDE Partition Manager.
- Enter your sudo password.
- Right click on your external HDD and select unmount.
- Then click Delete, Apply and select OK.
- Right-click on your "unknown" external HDD and select New.
- Then select ext4.
- Under Label, name your external HDD.
- Under Permissions, select Everyone.
- Then select Apply and then Apply Pending Operations and wait for the HDD to finish its formatting process.
- Click on the USB icon on the right side of the taskbar and select Mount.
- Switch back to Gaming Mode.
- Press the Steam button and select Storage.
- Highlight your external HDD and press the X button to make it the default storage for newly installed games.
That's everything required to add more storage to the Steam Deck via an external HDD or a microSD card.

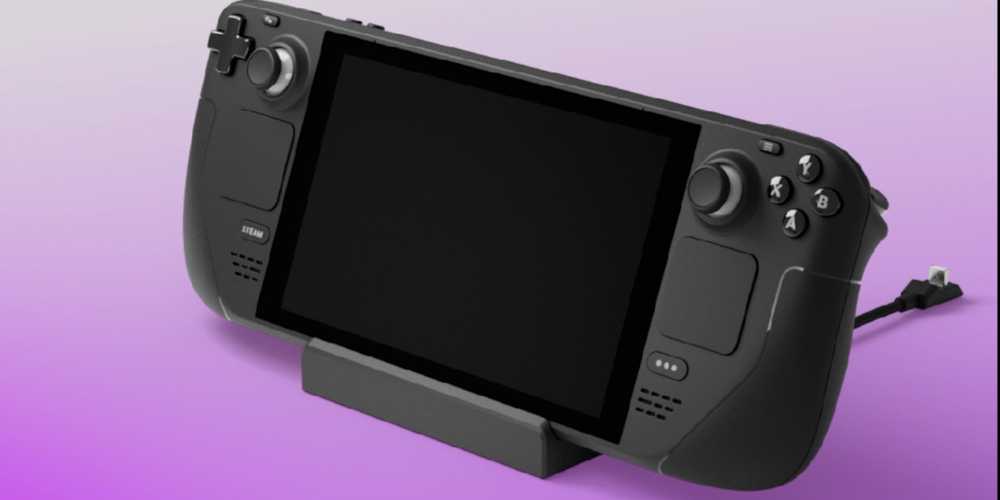
Valve Steam Deck
- Dimensions
- 16 x 5 x 3 inches
- Brand
- Valve
- Weight
- 3.54 pounds
- Battery
- 2 Lithium Ion batteries required